There’s any number of cell phone cases out in this big great world but what if you wish something truly unique and all your own?? Here’s an opportunity to have something no one else in the world has. Mr Nut Case invited me to try out their service. So I logged on and gave it a whirl.
I picked out my device on this page.
Pick the device by manufacture and model, then the type of case. Not all cases styles are available for every model. And sometimes a case will be temporarily out of stock. There’s three types of cases available:
Ultra Light Weight Slim Line case is made from 2mm polycarbonate.
Executive Flip Leather Case gets printed on the flip lid surface area.
Full Wrap Around Premium Edition is also a snap-on design with printing all around the case.
Next step: The Layout
Now pick your layout – this is where you decide how many images you will end up using and where they are located on the case. There’s really a large number of choices available. Since I had a specific photo in mind I chose the single layout.
Once you have decided what your layout will look like you are automatically directed to the page where you can upload your photos. You’ll get a reminder to crop and position your uploaded photos.
Upload an image from your computer by clicking the green “”browse” link on the left side of the window. From the Upload window drag your picture over to the case outline and then scale Up or Down. Position your photo over the case outline by moving it until it fits exactly where you want it. The Case template lets you see where the camera and other holes are. If you are uploading several images you’ll just do this step several times. And if you need to rotate an image that feature is available from the controls on the right side of the page.
Stay on this page because after uploading photos there’s other stuff to do. You can add clipart from the suggested window.
 I played around adding some of the clip art. This is ridiculous, of course, but this is another element that makes your case all your own. Notice I was experimenting with a background that is included on the site. There’s an array of such patterns. Check out the variety of collection images.
If you have uploaded several photos you can choose a background color to fill the space between those images.
Add text from this window. Change it’s color, add a background color and make it Bold or Italic. Change it’s size. On the case outline you can position the text where you want it to appear.

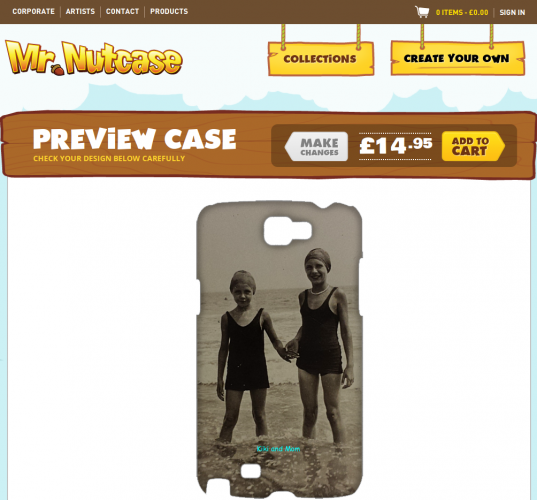
Tap “Preview” to see how your case will appear when it’s printed. This brings you to a new page. If you need to change something tap “Make Changes” to return to the previous page. When satisfied tap “Add to Cart”.
You must log into an account if you already haven’t done so in order to see the preview of what is in your basket.
When you are all ready to send in the order because you just can’t wait to get this fabulous new and unique phone case, it’s time for Checkout!!
Checkout gives you several options and address / payment information required. The usual stuff.
Once completed the next page is a summary of your order. They send you an email confirmation of your order. I sent in the order on February 22. I got an email two days later letting me know the case had SHIPPED!! And it arrived March 5th.
 Here it is. It came in a bubble package. Simple and it must be tough because even after a trip over the ocean it was in perfect condition.
I was trying very hard to get a good picture of the texture that this case has. It’s knobbly sort of feeling but still smooth.
 trying to get an angle so you see the holes around the case. In case anyone is wondering I choose this photo of my mother and aunt when they were children. My aunt recently passed away and this is a great way to carry her around with me. So, this phone case is about as unique as it gets.
Mr Nut Case also has an interesting feature that I will be trying soon. Artists are encouraged to join their affiliate scheme where you can make money from your own designs. I’ll be checking out how to join and upload my designs.


 Next step – the Layout


